
Editing Template Settings
You can only make edits in draft version of templates. Make sure you revise the template to create a draft version to make the edits.
1. When you are in the draft version of the template, click on the edit icon.
2. You have the ability to add a default icon, report logo, set up to 5 display lines, manage status options, set workflows and various other settings. You will need to scroll down to see the workflows and other settings. After you make changes please hit Save.
3. Editing Name, Enable Templates, Type, and Report - Select the Type you want the template to be assigned to. This template will only appear in the Type you select. Select which report you would like associated with the template. To disable a template, uncheck the "Enabled" box.
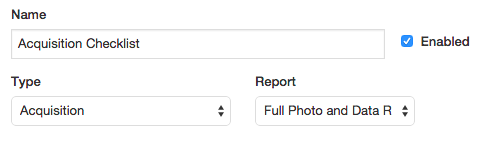
Note: On the template list page the "Only show enabled templates" box will automatically be checked by default (see below). If you would like to see disabled templates or enable a previously disabled template you will need to uncheck the box.
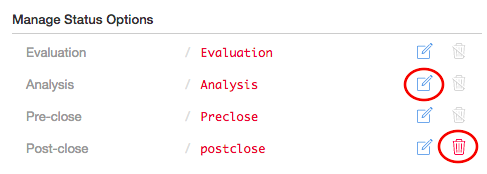
4. Status Options - To delete the default Status Options click on the delete icon. To edit a status option click the edit icon.
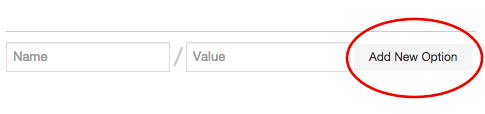
- Adding Status Options - To add a Status Option fill in the Name and Value of the option and click the Add New Option button
5. Icons, Logos & Display Lines
- Default Icon: Upload a square image as the icon that is displayed next to each project.
- Report Logo: The report logo will show up at the top of your reports. 9Max height: 100px and max-width: 150px)
-
Display Lines: You can have up to 5 display lines. Choose the fields that you would like to display in the list view and in the header.
- Media Field: If you would like a photo that was captured from the field to be displayed next to each project in the list view you can select it here. (Example: Front of house photo) The field must be an image field.
6. Workflow Types: Select which workflows you would like enabled on this template.
7. Setting a Customer or Manager
- Any work generated using this template will now show the customer and/or manager automatically
- Any work generated using this template will now automatically grant access to this customer and/or manager
- The customer and/or manager can be overridden in the work order by portal admins and managers
8. Adding Documents: Attach documents which will be automatically included with each project you create. Click on Upload a File, select the document from your computer, and choose if you want it hidden from customers and/or field users. Hit save when done.
Report Logo
Report logos can be added to your template to override the logo displayed in reports on a template by template basis.
If you do not have access to this feature contact support@sitecapture.com to learn more.
1. Uploading a Report Logo
- Go to the Template Editor to add a logo. The logo must be a max height of 100px and max width of 150px. Click on upload Report Logo and choose your file. Hover over the logo to view it.
2. Viewing the Report Logo
- Go to a project and click on the Report icon. The report logo will appear at the top left corner of the report.
Adding Documents/Attachments
Documents (PDF files) can be attached at the template level with a max file size of 50mb. The document that you attach to a specific template will then automatically be attached to each work order you create from that template. This feature is useful if you have detailed instructions for your field users and vendors that they need access to while working on their orders. However, you can also attach documents intended for your admin and manager users which you can hide from the field user and also, if you have customer role users, these can be hidden from them as well.
1. Select the template you wish to add a document. Click on the template editor. Scroll to the bottom and click on Upload a File.

2. Select the document from you computer.

3. You have the ability to change the name of your document and hide these documents from either field users or customers. Click Save.

Display Lines Video
This video shows you how to edit your template settings and add up to five display lines. Display lines can be a field from your template and will replace the untitled project name.
Please see this guide on how to change more template settings.
Comments