
Azimuth, Elevation Angle, and Elevation on Photos
SiteCapture now supports an new version of the Android camera, to have this turned on please contact support@sitecapture.com. Once turned on users will need to refresh their configuration for the change to be reflected in the app, see Version of SiteCapture & Refresh Configuration for more details.
Taking Photos
Users can take photos using the front facing camera (selfies), rear facing camera, and capture photos using the volume buttons on the device.
1. Tap on the camera icon
2. The camera will open. Tap on the white circle to take a photo. Users can also take photos by clicking the volume buttons on your device.
3. To add a Flash, tap on the flash icon on the top left. Tapping the icon once will activate Auto Flash, which will turn on your camera's flash automatically based on the brightness your environment. Tapping again will turn on flash for all photos taken.
Note: Auto Flash will only work on the rear camera
4. To take a selfie or use the front facing camera, tap the camera icon to the right of the white capture button.
5. Tap "Done" on the lower left to exit the camera.
6. To add a photo caption tap the photo.
7. Tap to start typing and enter a caption.
8. Download photos to your device by tapping on the download icon.
Deleting Photos
1. Press and hold on the photo you want to delete. An x icon will appear. Click on the "x" and the photo will be permanently deleted.
Azimuth, Elevation Angle, and Elevation on Photos
Azimuth (compass icon): an arc of the horizon measured between a fixed point (as true north) and the vertical circle passing through the center of an object usually in astronomy and navigation clockwise from the north point through 360 degrees
Elevation Angle (triangle icon): the vertical angle from the horizon that the camera is facing when photo is captured.
Elevation (mountain icon): the height above the level of the sea in feet
The azimuth, elevation angle, and elevation will be captured automatically on every photo that you take.
1. Click on the 'i' icon on the top right if you wish to see the azimuth, elevation, and elevation angle being captured as you take a photo. Click it again if you wish to hide them.

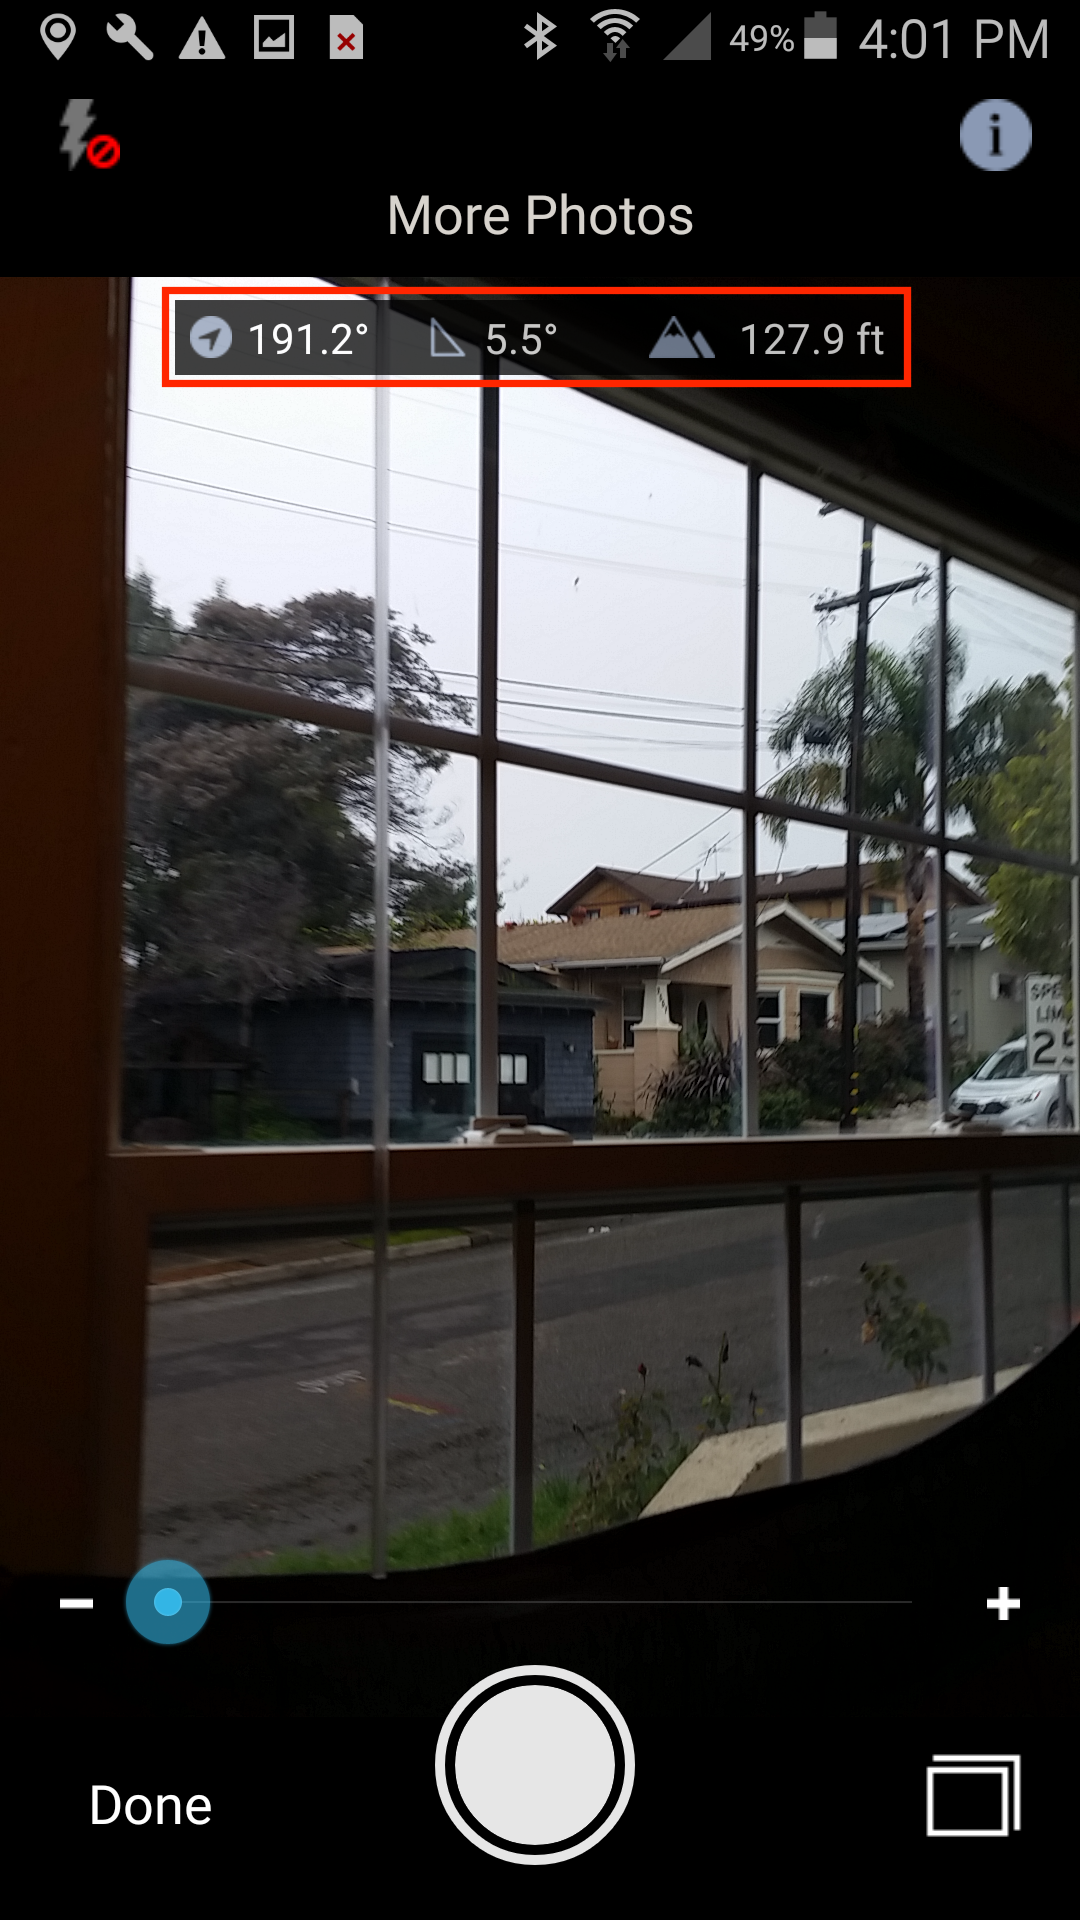
2. The azimuth, elevation angle, and elevation (ft) will display on the photo underneath the caption.

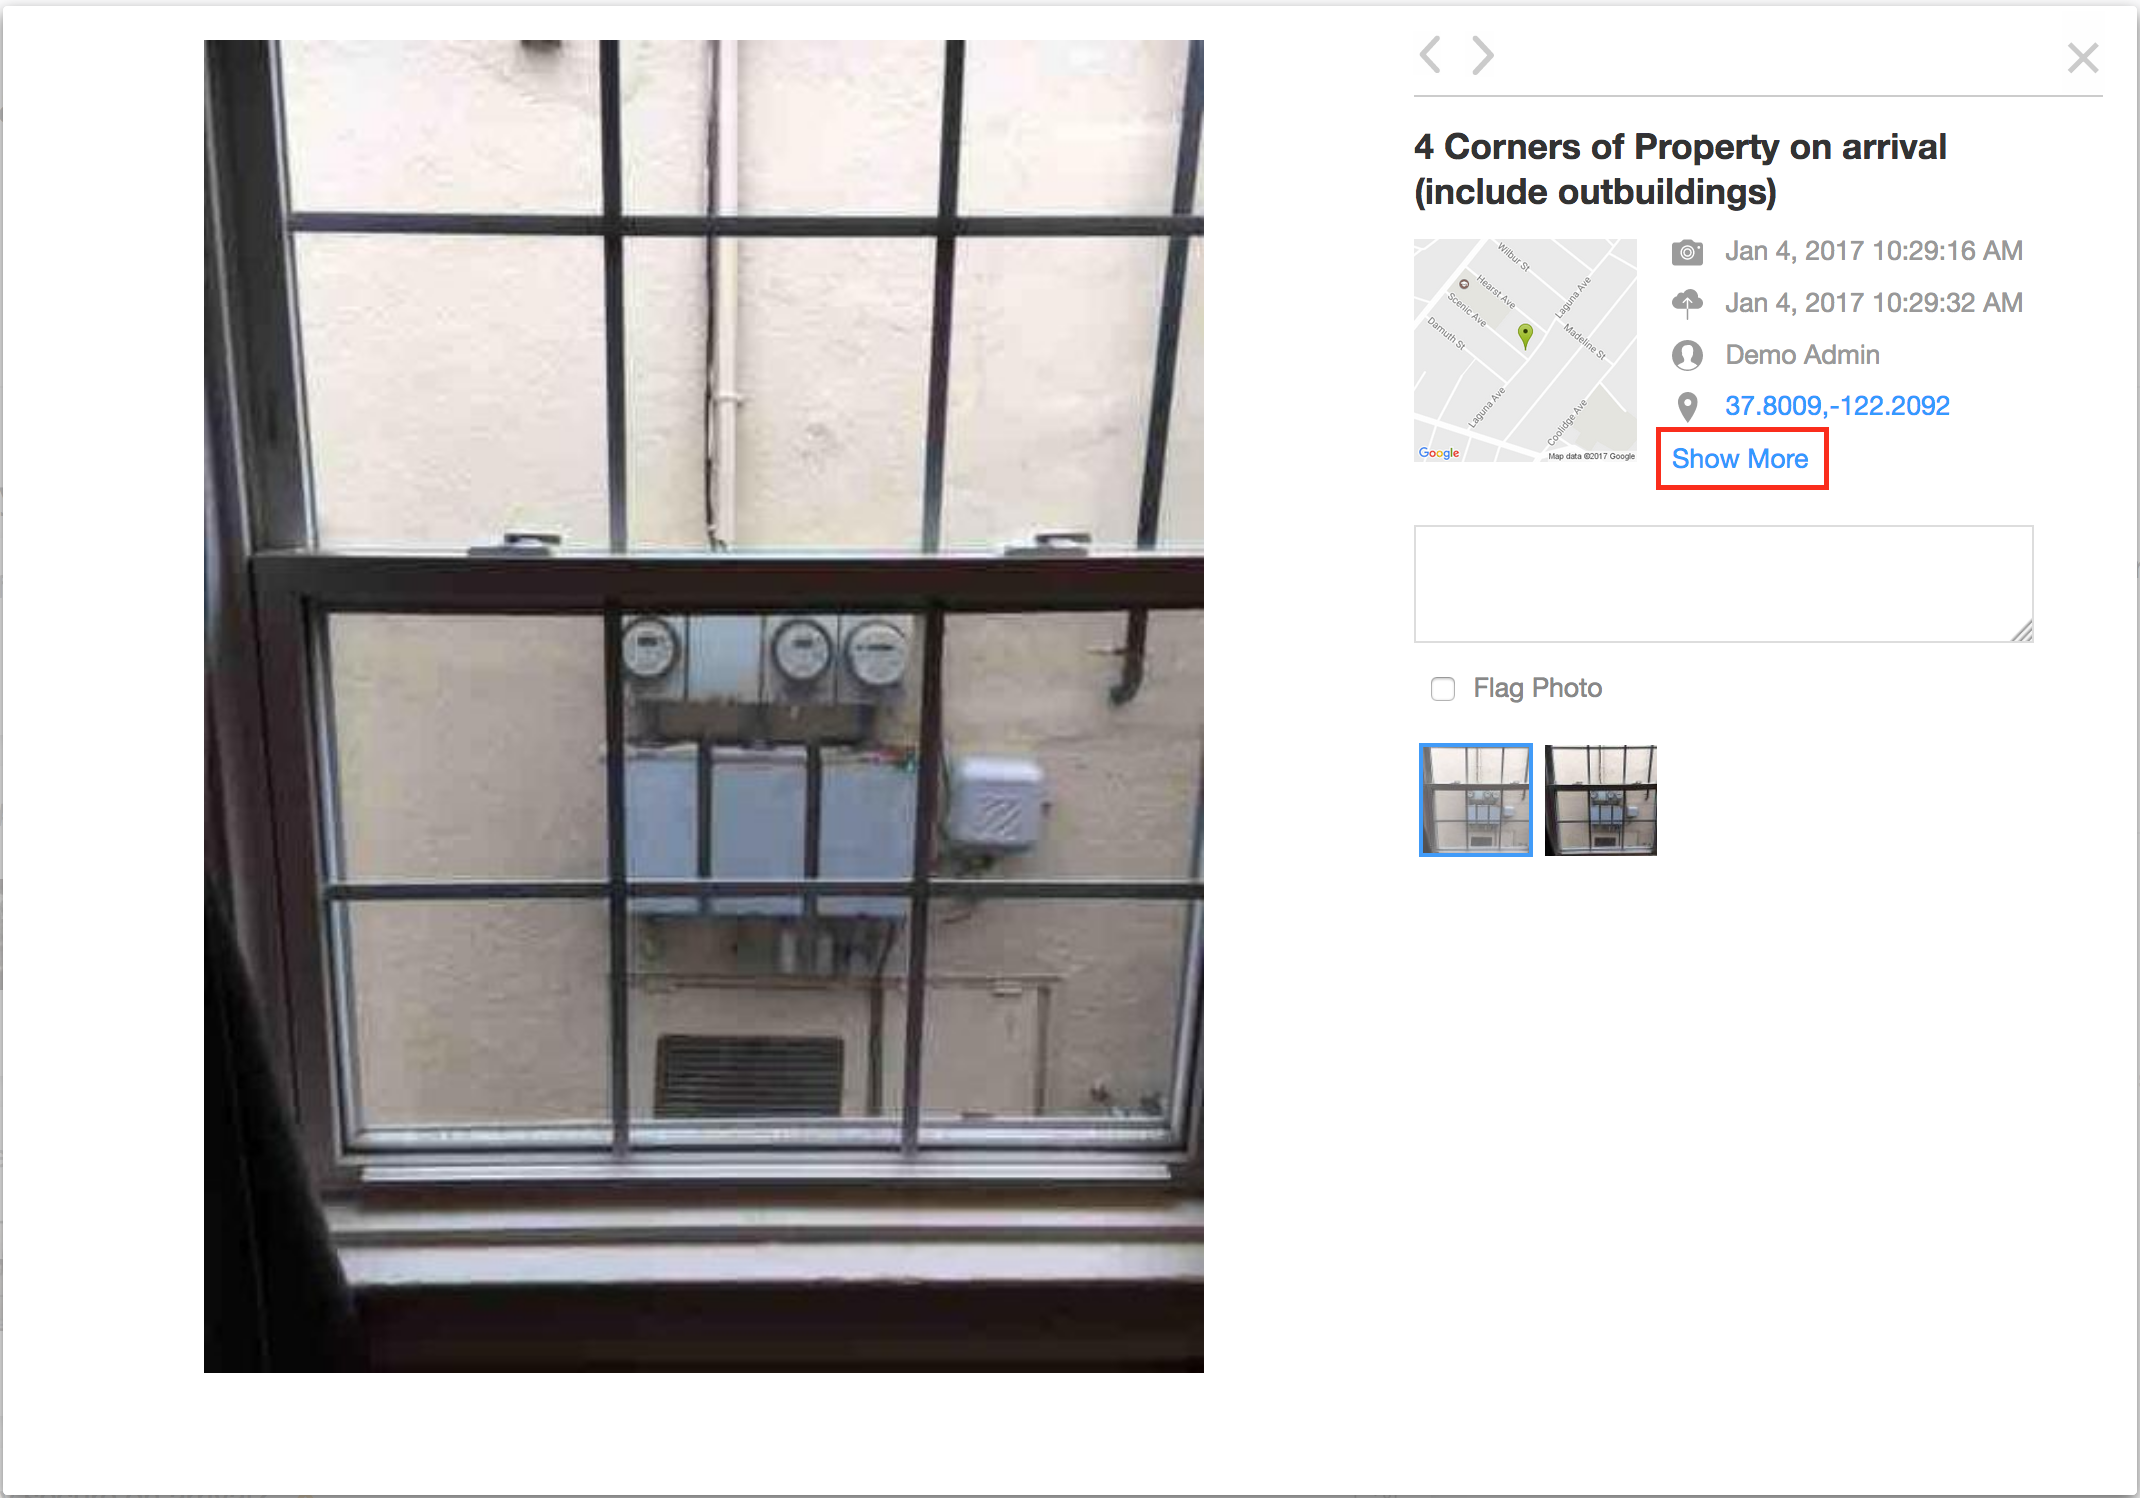
3. To view this information in the web portal, you will need to open the photo in the image viewer. Click on "Show More".
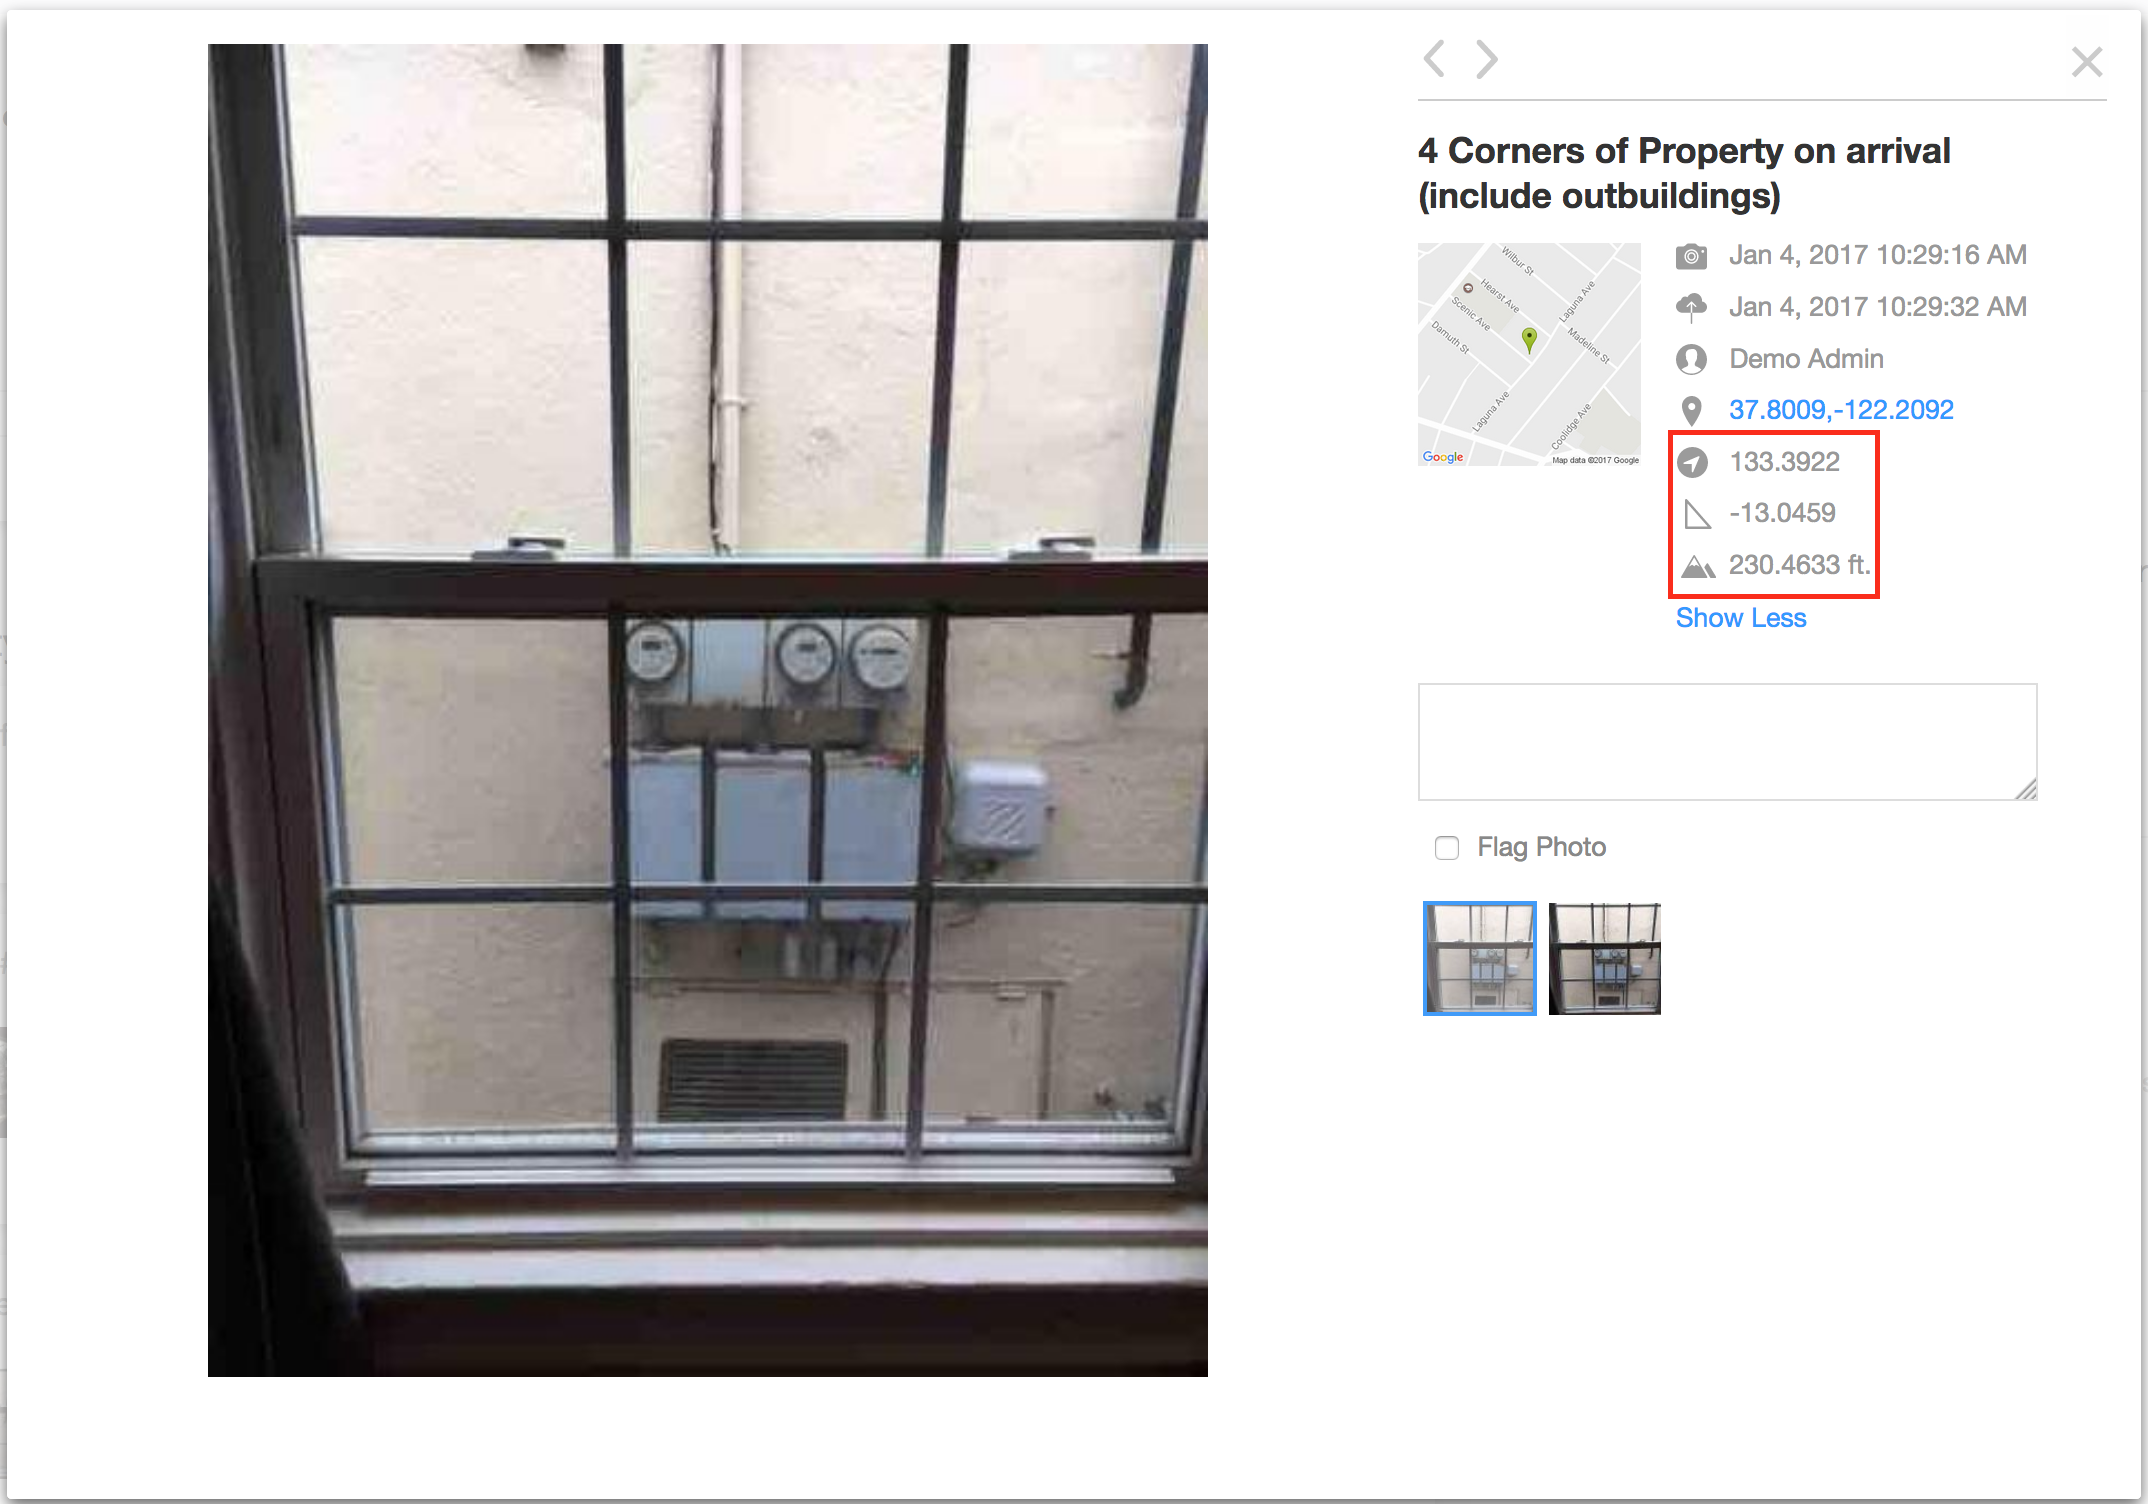
4. The azimuth, elevation angle, and elevation (ft) will be displayed. Click on "Show Less" if you wish to hide this information.
Select and Upload Videos
Users can upload videos directly from their device.
1. Open a project and tap on the camera/video icon. In camera mode, tap on the bottom right icon to open the device's album.
2. When the permissions pop up appears, tap "Allow" to allow SiteCapture to access to your device's photos, media, and files.
3. Choose "Videos" and then tap on the album.
4. Select the video that you want to upload. Selected videos are resized/compressed according to the resolution specified on the field and the quality level and maximum video length on configuration. When the video is finished compressing, new video thumbnail(s) will appear in the section view.
Viewing Photos
When viewing photos, you can zoom in or tap to hide the UI.
Comments