
If you would like to add gps mapping to your projects, you can either do a mass import which will automatically geocode the projects or you can also manually geocode each project. The directions below are for manually geocoding your projects.
1. You have 3 options to set up your template. The field keys MUST match exactly for it to work correctly. The field names can be titled to your choosing.
- Set up one field with the field key: address
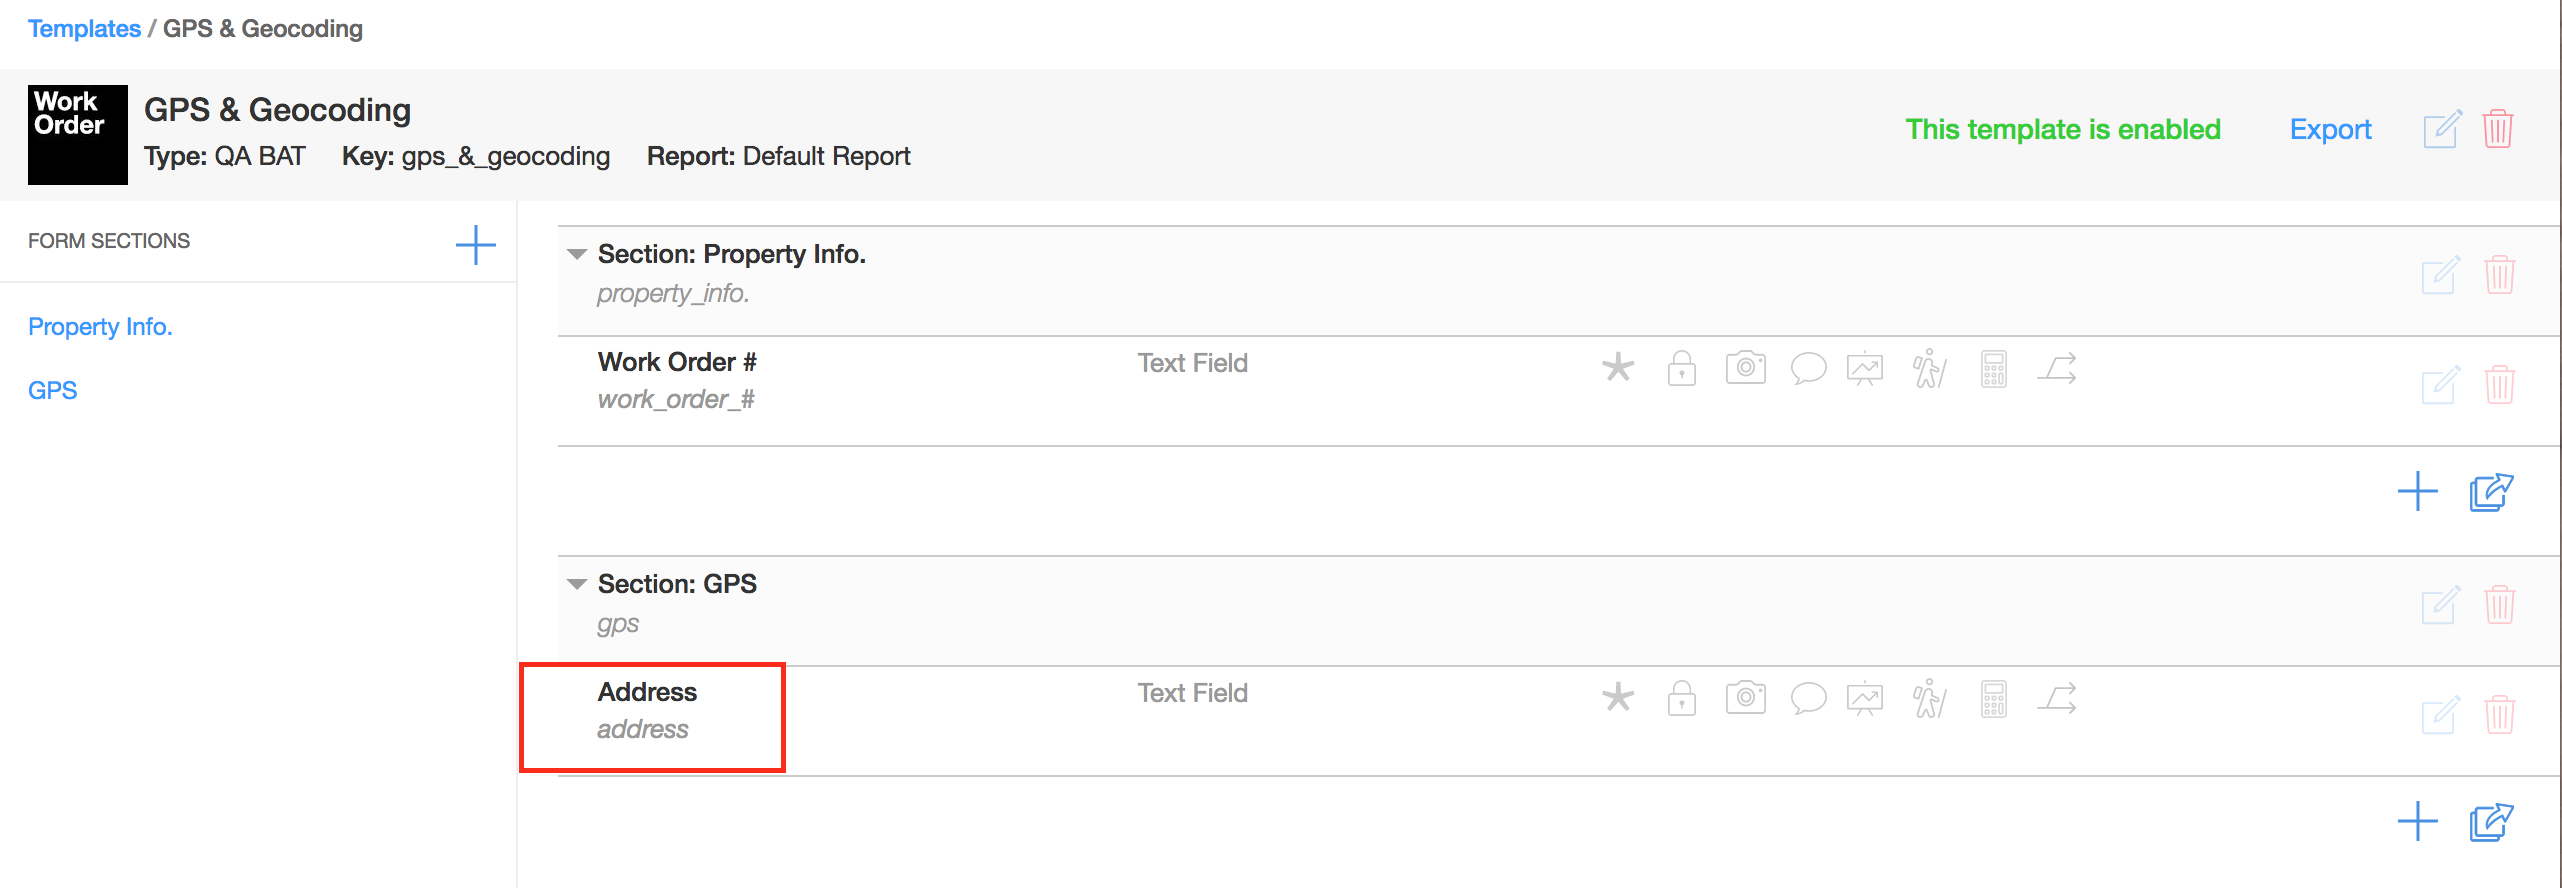
The Field Key is a unique identifier for each field within a template. The field key can be found within the template configuration (see: Adding & Editing Fields: Field Key), or by hovering over the field name in the project page (see: Field Information: Field Key and Last Updated). Field keys are case sensitive and must match exactly in any use case.
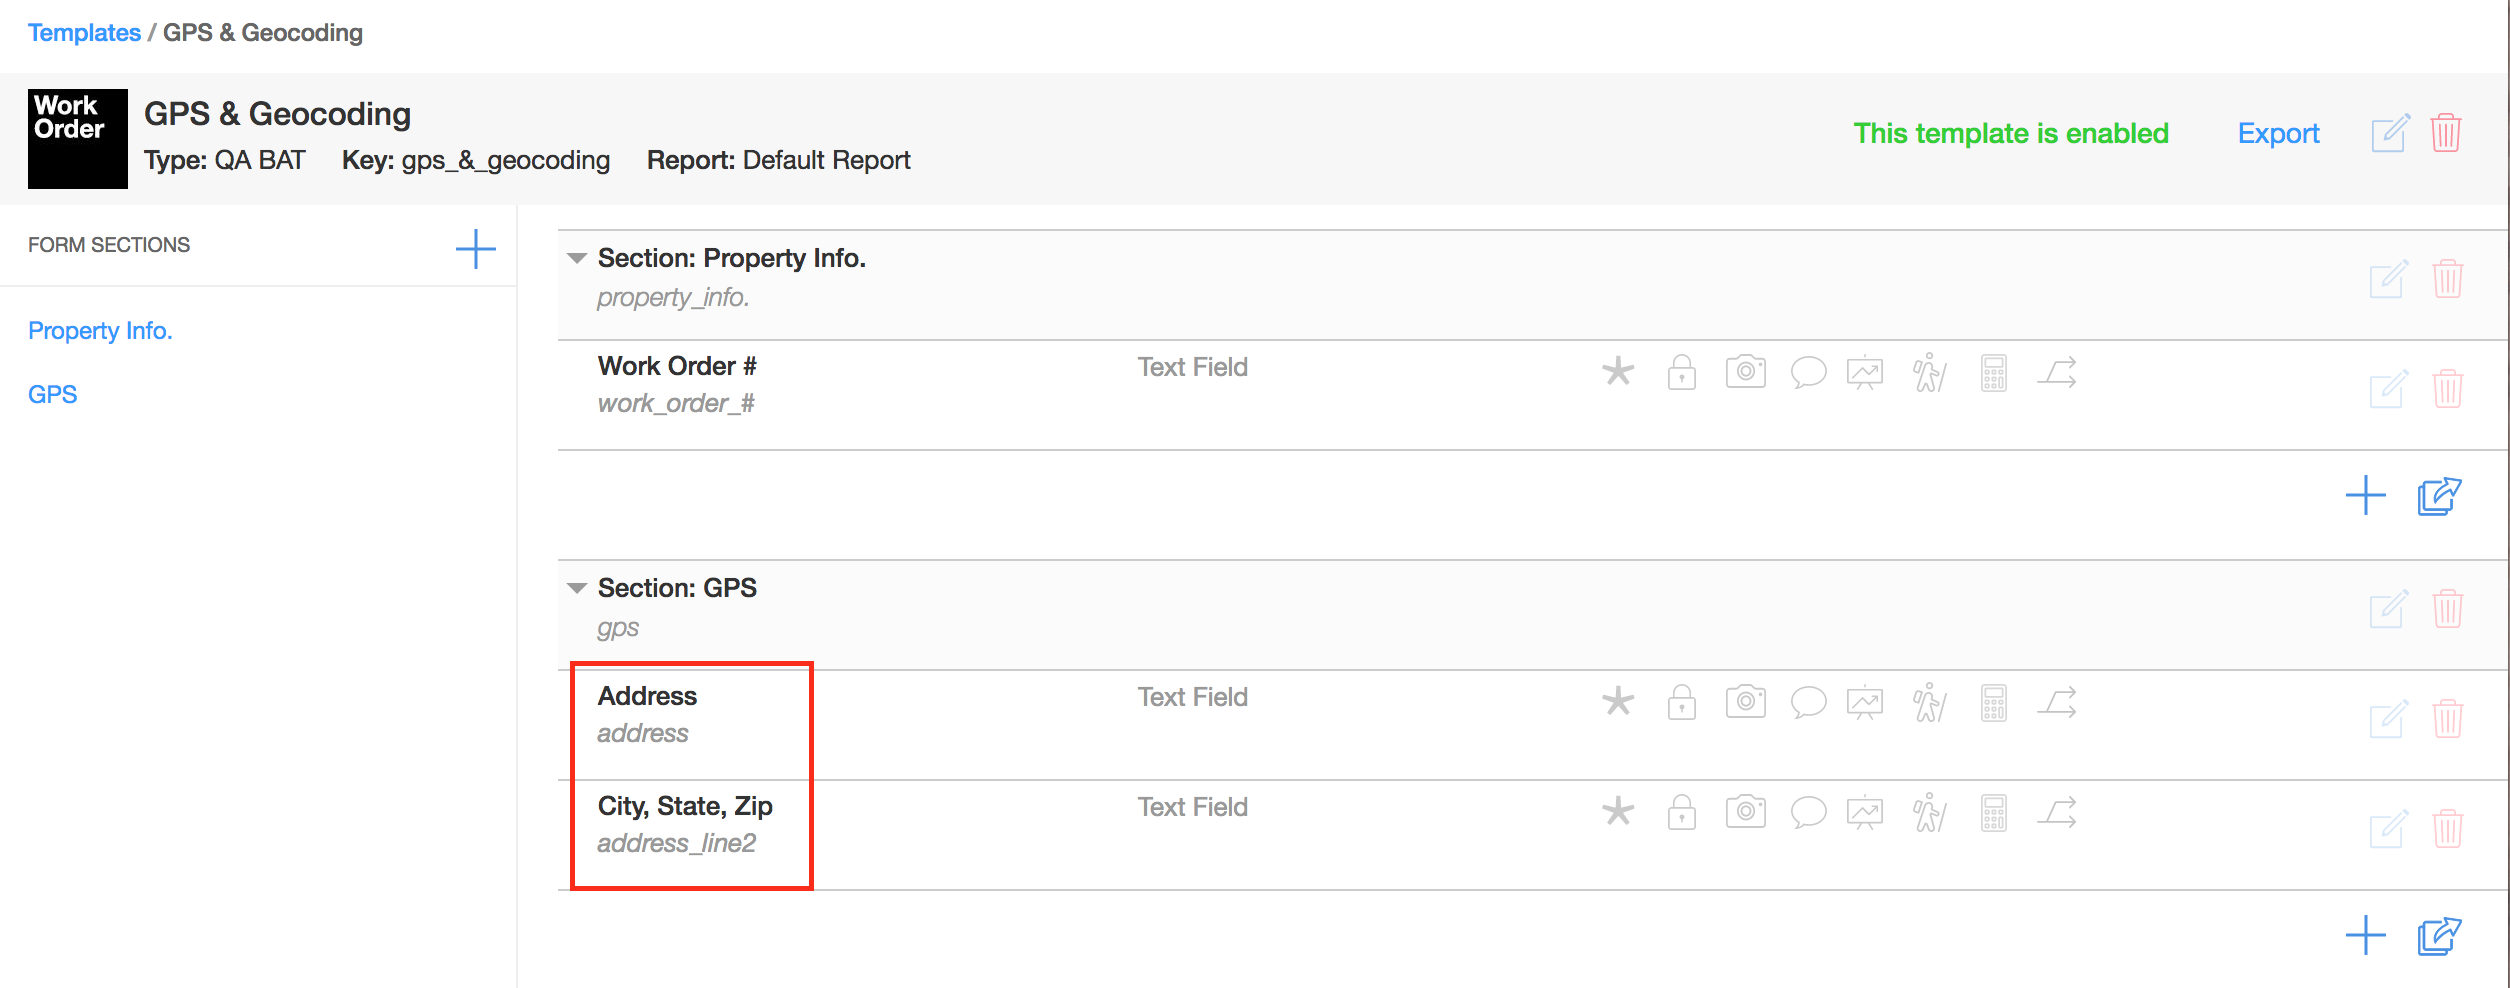
- Set up two fields with the field keys: address, address_line2
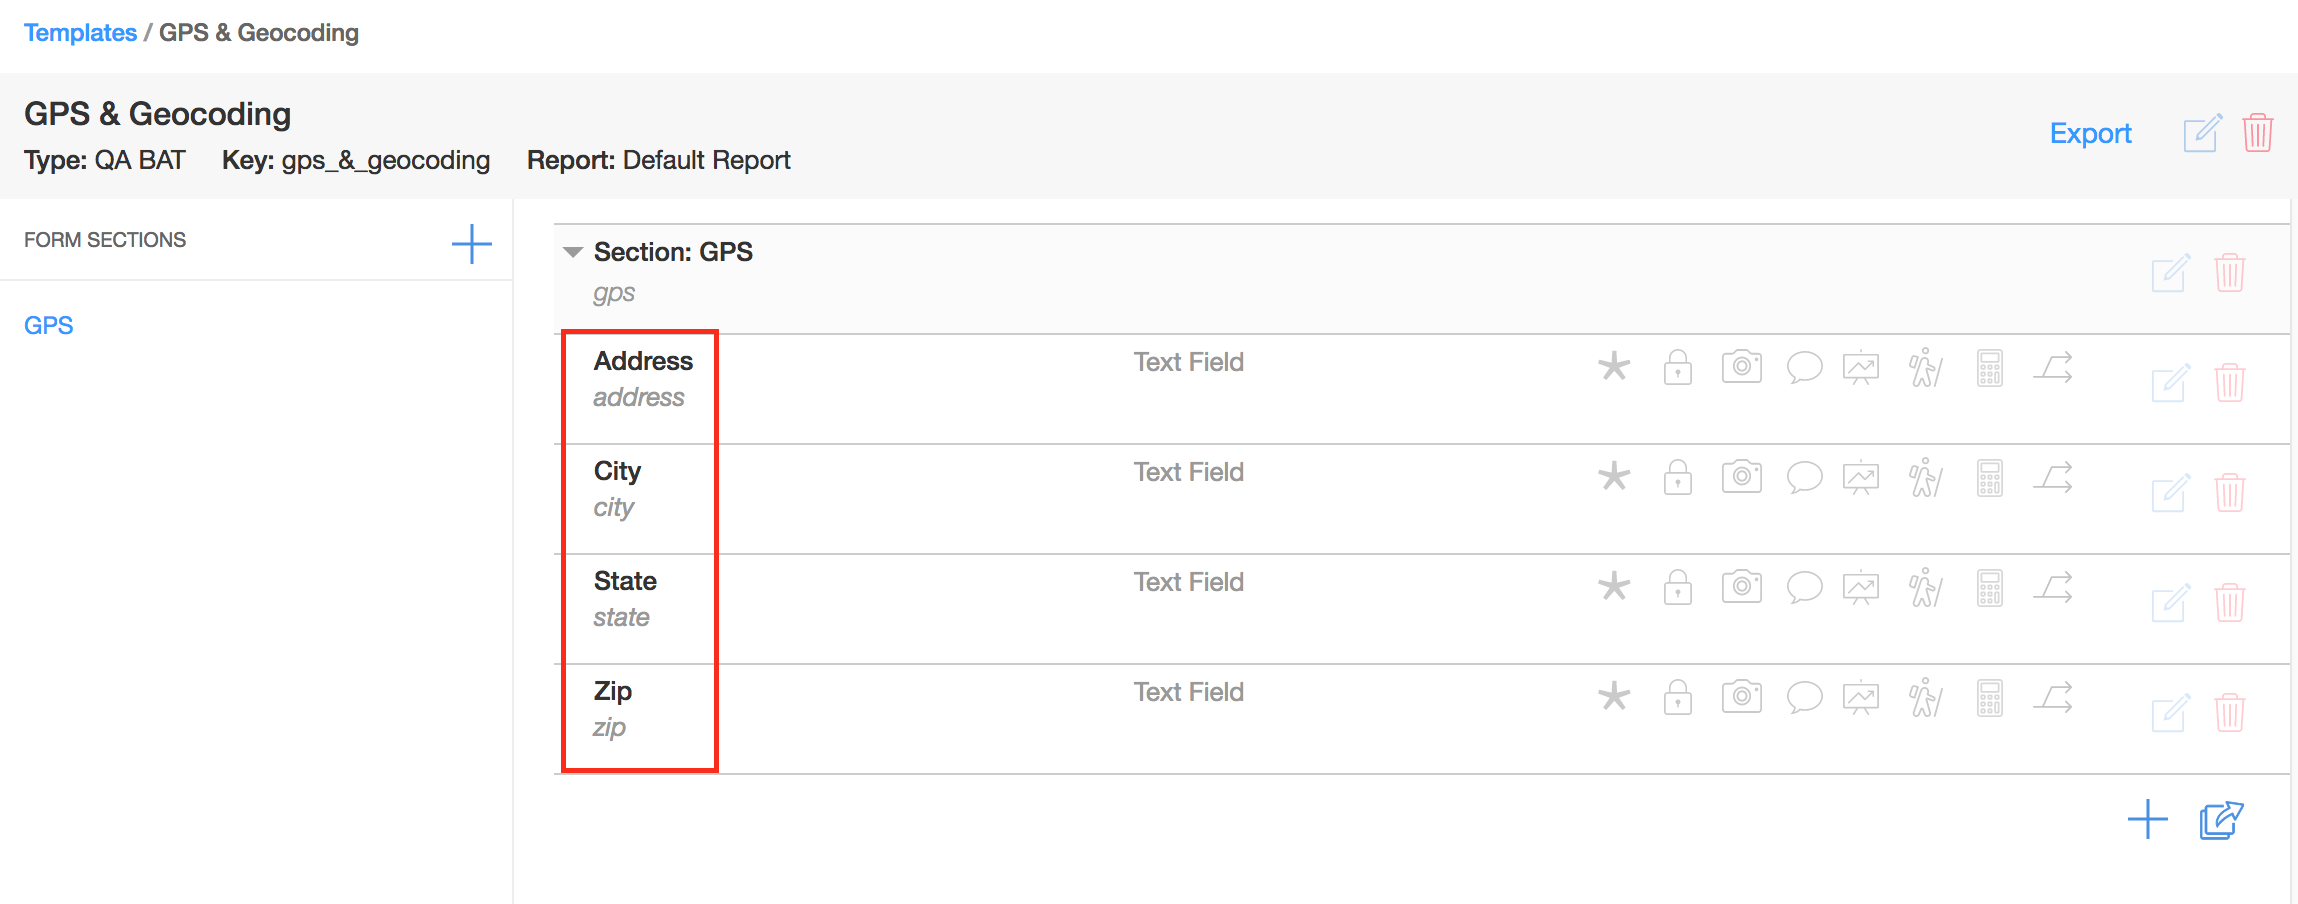
- Set up four fields with the field keys: address, city, state, zip
2. Once you have your template set up correctly, create a new project with that template. Enter the address and then click on the Geocode icon.
3. You will know that the project has been geocoded correctly when you see the Map link turn green. You can click on the icon to get directions to this project. When you assign this project, the user will be able to see the project on mobile in the Map view (iOS only) and get directions.
4. If you need to use a different address you will need to refresh the geocode. Enter the new address and then click on the 3 dots on the right and click on "Refresh Geocode". When you click on the map icon, you will see it takes you to the new address.
Comments