
This guide explains how to take photos, add captions, and save photos to your iOS device. The features in SiteCapture camera include the front facing camera (selfie mode), wide angle lens, and various flash modes. We also provide support for taking photos by using the volume buttons and using selfie sticks.
1. Click on a project in which you want to add a photo.
2. Scroll to a field that has a camera icon and click the icon. The camera icon indicates that photos are allowed in that field. An orange camera icon indicates photos are required.
3. The camera will open and you can focus using the touch screen. When you are ready to take your photo click on the white circle. You also have the option to use the up or down volume buttons. When you are done taking photos click on Done in the bottom left corner.
4. Zooming Out/In: A user can zoom out (pinch photo) to use the wide angle lens. Zoom back in to use the normal lens. The first screenshot is with the normal lens. The second screenshot shows the wide angle lens view. On iOS devices that support optical zoom you can zoom in up to 8x.
5. Flash Modes: Users can toggle between three flash modes - on, off, auto.
6. Front facing camera: Tap on the camera icon to the right of the white circle to use the front facing camera for selfie mode.
7. Adding a photo from your phone's album: Tap the album icon on the bottom right side. You must allow permission to access your photo library in order to select photos. (Settings>SiteCapture>Photos>Full Access)
8. To add a caption to your photo, go back to the photo and click on it to open it. Click "Add Caption", type your caption and click done.
9. To save a photo to your iOS device click on the download icon below the photo.
10. A prompt will appear to allow SiteCapture to access your photos if you want to add photos to your iOS mobile photo library. You must select either "Allow Access to All Photos" (recommended) or "Select Photos".
11. After selecting OK, a blue box will appear above the photo indicating it has been saved to your photo library.
Viewing and Editing Photos
Users can view, zoom in on photos, and edit them using the photo editing tool.
1. Tap on the photo you would like to view. Zoom in on the photo by pinching the photo in and out.
2. Tap the pencil icon on the lower left corner of the screen to edit the photo.
3. Make edits to the photo with the various photo editing tools (Adjustment, Crop, Draw, Rotate, etc.) Swipe left on the tool bar at the bottom for more editing tools.
4. To brighten a photo, click on Adjustment. Slide the brightening tool on the right side to adjust the photo. After making the desired changes click "OK" and then "Done".
5. To draw on the photo, click on Draw. Click the slider to adjust the color and/or thickness of the drawing tool. Click on the grey dot to switch to eraser if you need to eraser something. When you are done click "OK" and then "Done".
Select and Upload Videos
Users can upload videos directly from their device.
1. Open a project and tap on the camera icon. In camera mode, tap on the bottom right icon to open the device's album. You must set the permissions to allow access to your device's albums.
2. Select the album and then select a video or multiple videos you want to upload. Tap "Done" will exit the videos selection screen. New video thumbnail(s) will appear in the section view.
3. To upload the video, go to the Project List or Project Detail screen and tap on the sync icon. If the video sync fails, it gets retried on next run.
Azimuth, elevation angle and elevation on photos
Azimuth (compass icon): an arc of the horizon measured between a fixed point (as true north) and the vertical circle passing through the center of an object usually in astronomy and navigation clockwise from the north point through 360 degrees
Elevation Angle (triangle icon): the vertical angle from the horizon that the camera is facing when photo is captured.
Elevation (mountain icon): the height above the level of the sea in feet
The azimuth, elevation angle, and elevation will be captured automatically on every photo that you take.
1. Click on the 'i' icon on the top left if you wish to see the azimuth, elevation angle, and elevation being captured as you take a photo. Click it again if you wish to hide them.
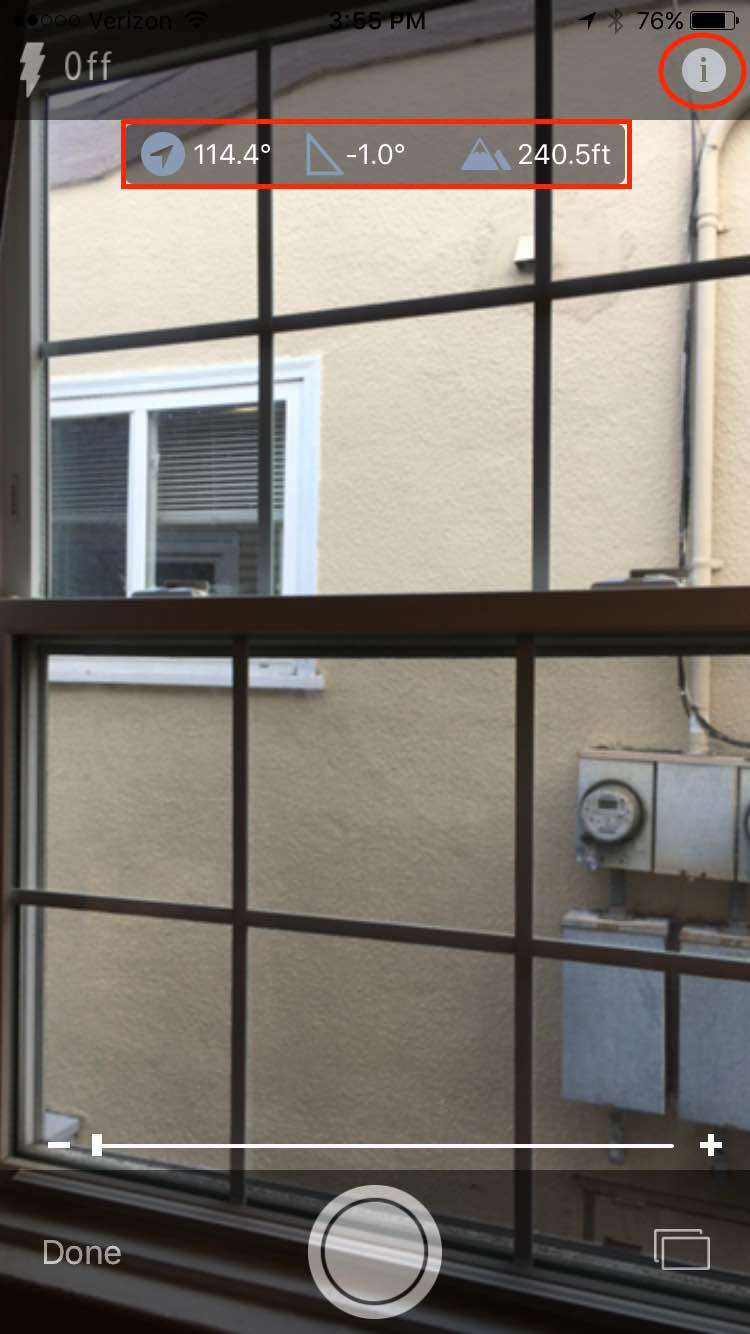
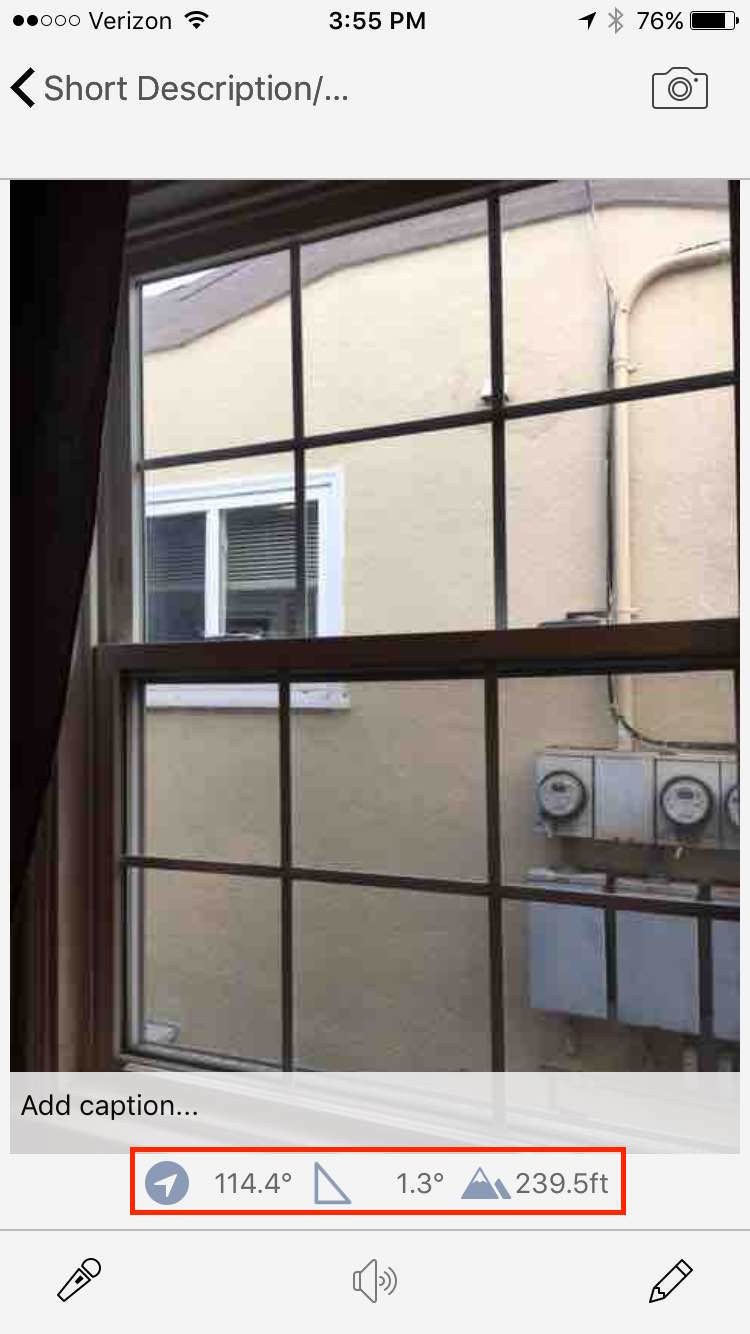
2. The azimuth, elevation, and elevation angle will display on the photo underneath the caption.
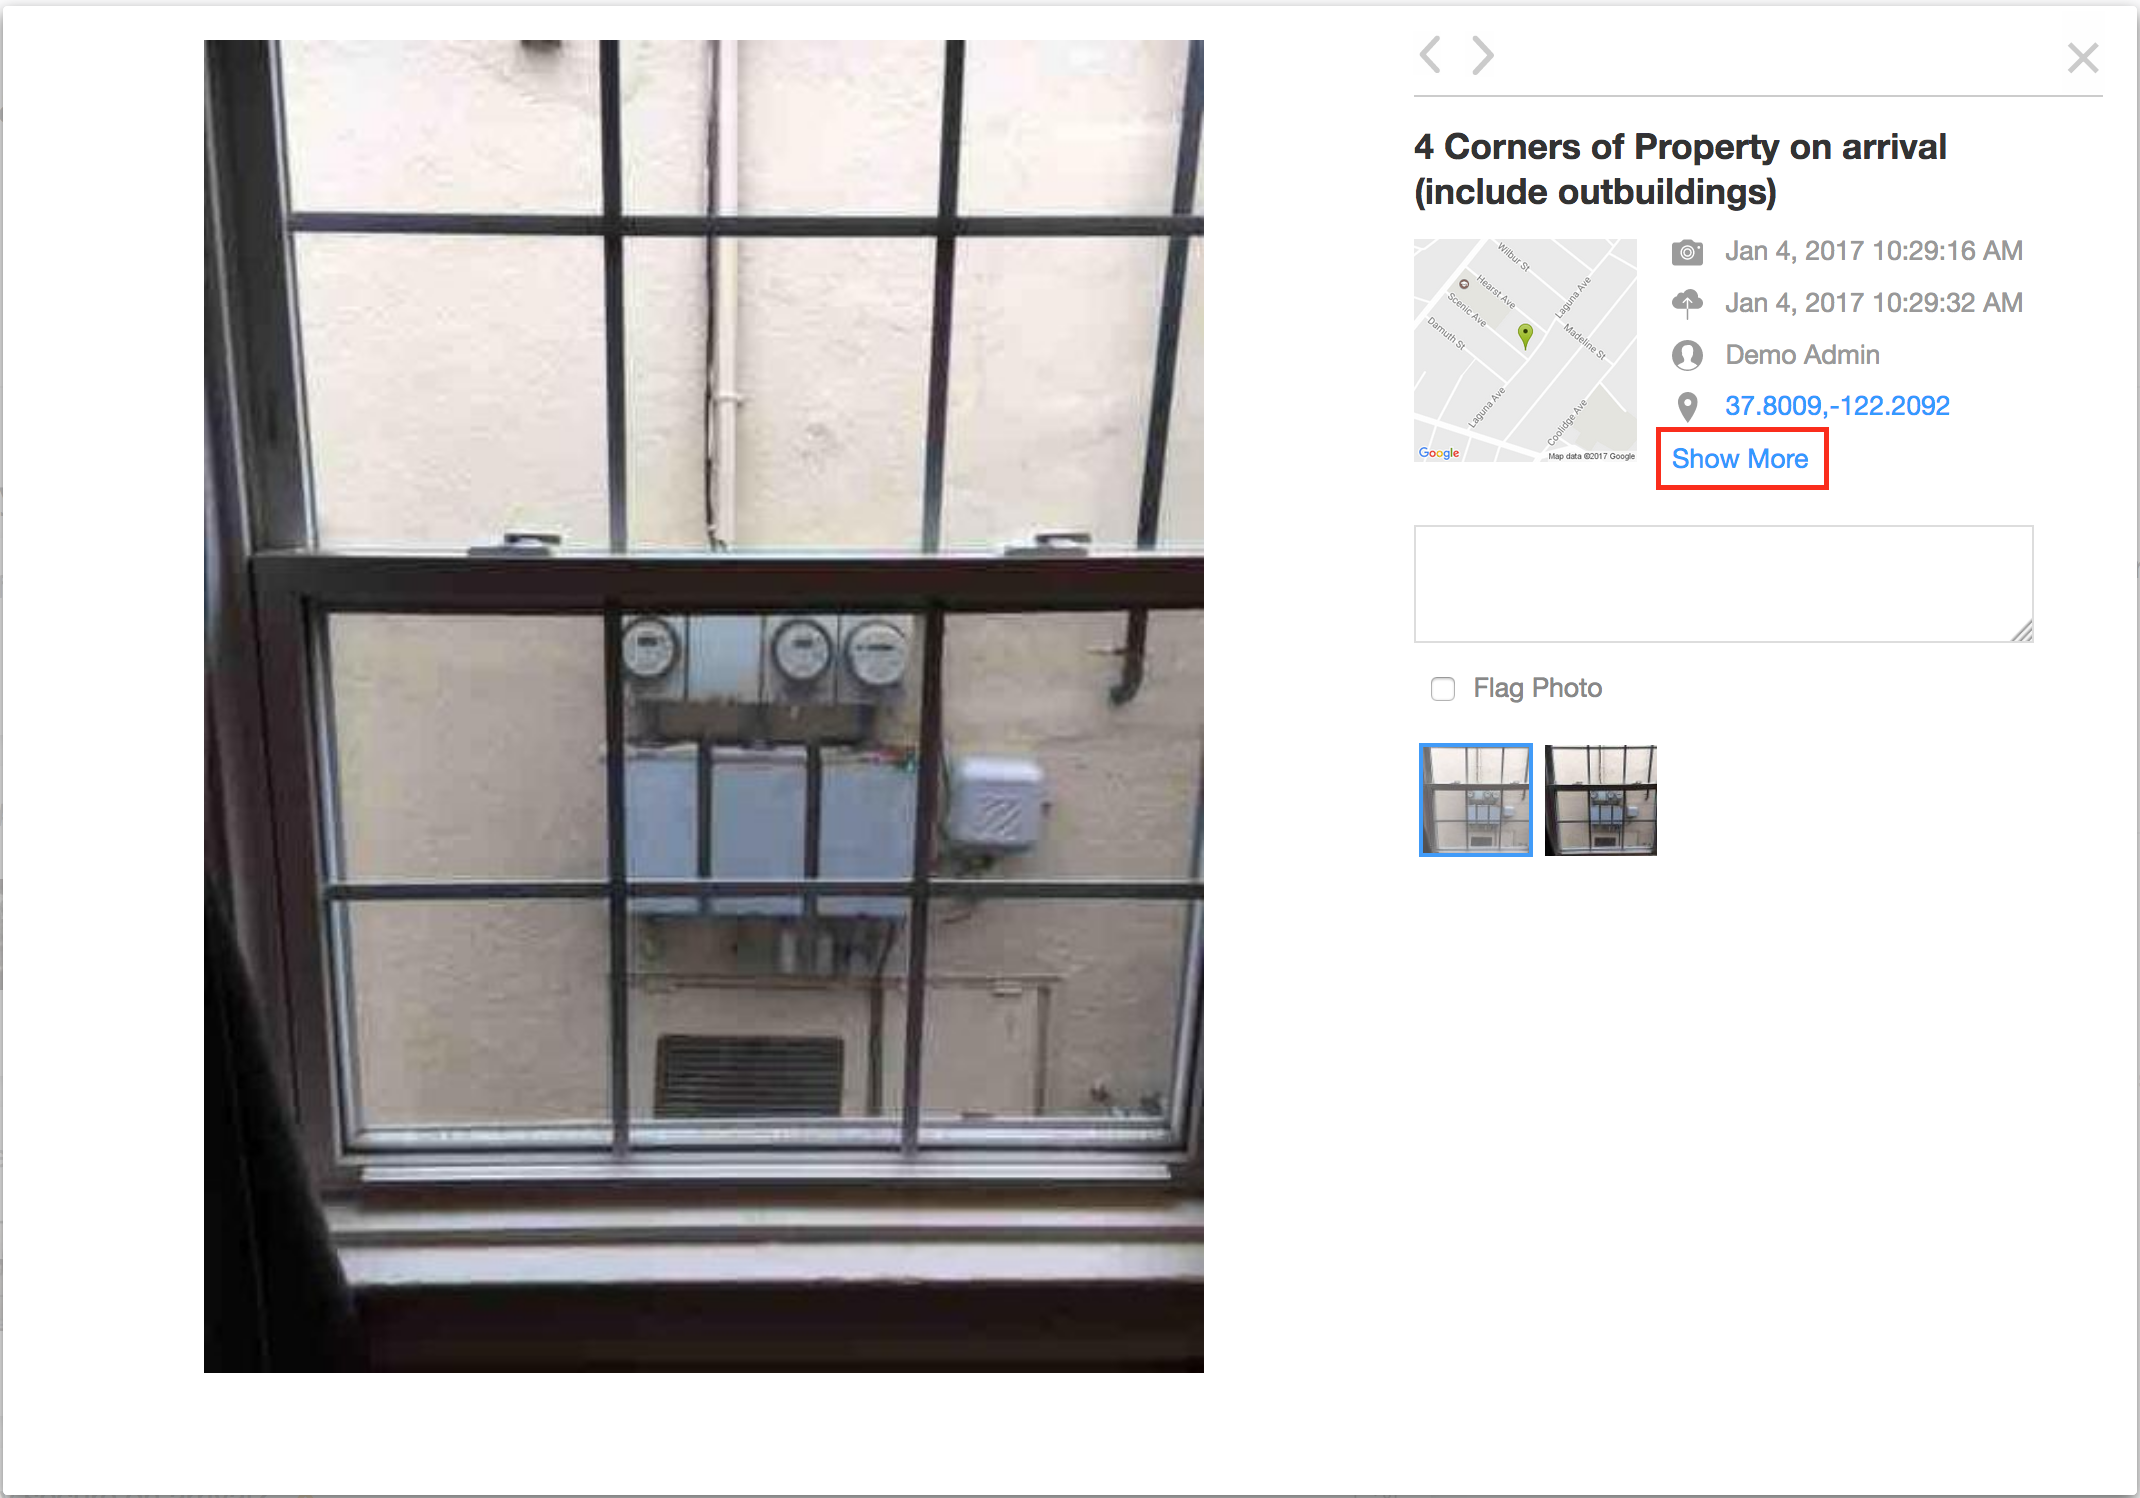
3. To view this information in the web portal, you will need to open the photo in the image viewer. Click on "Show More".
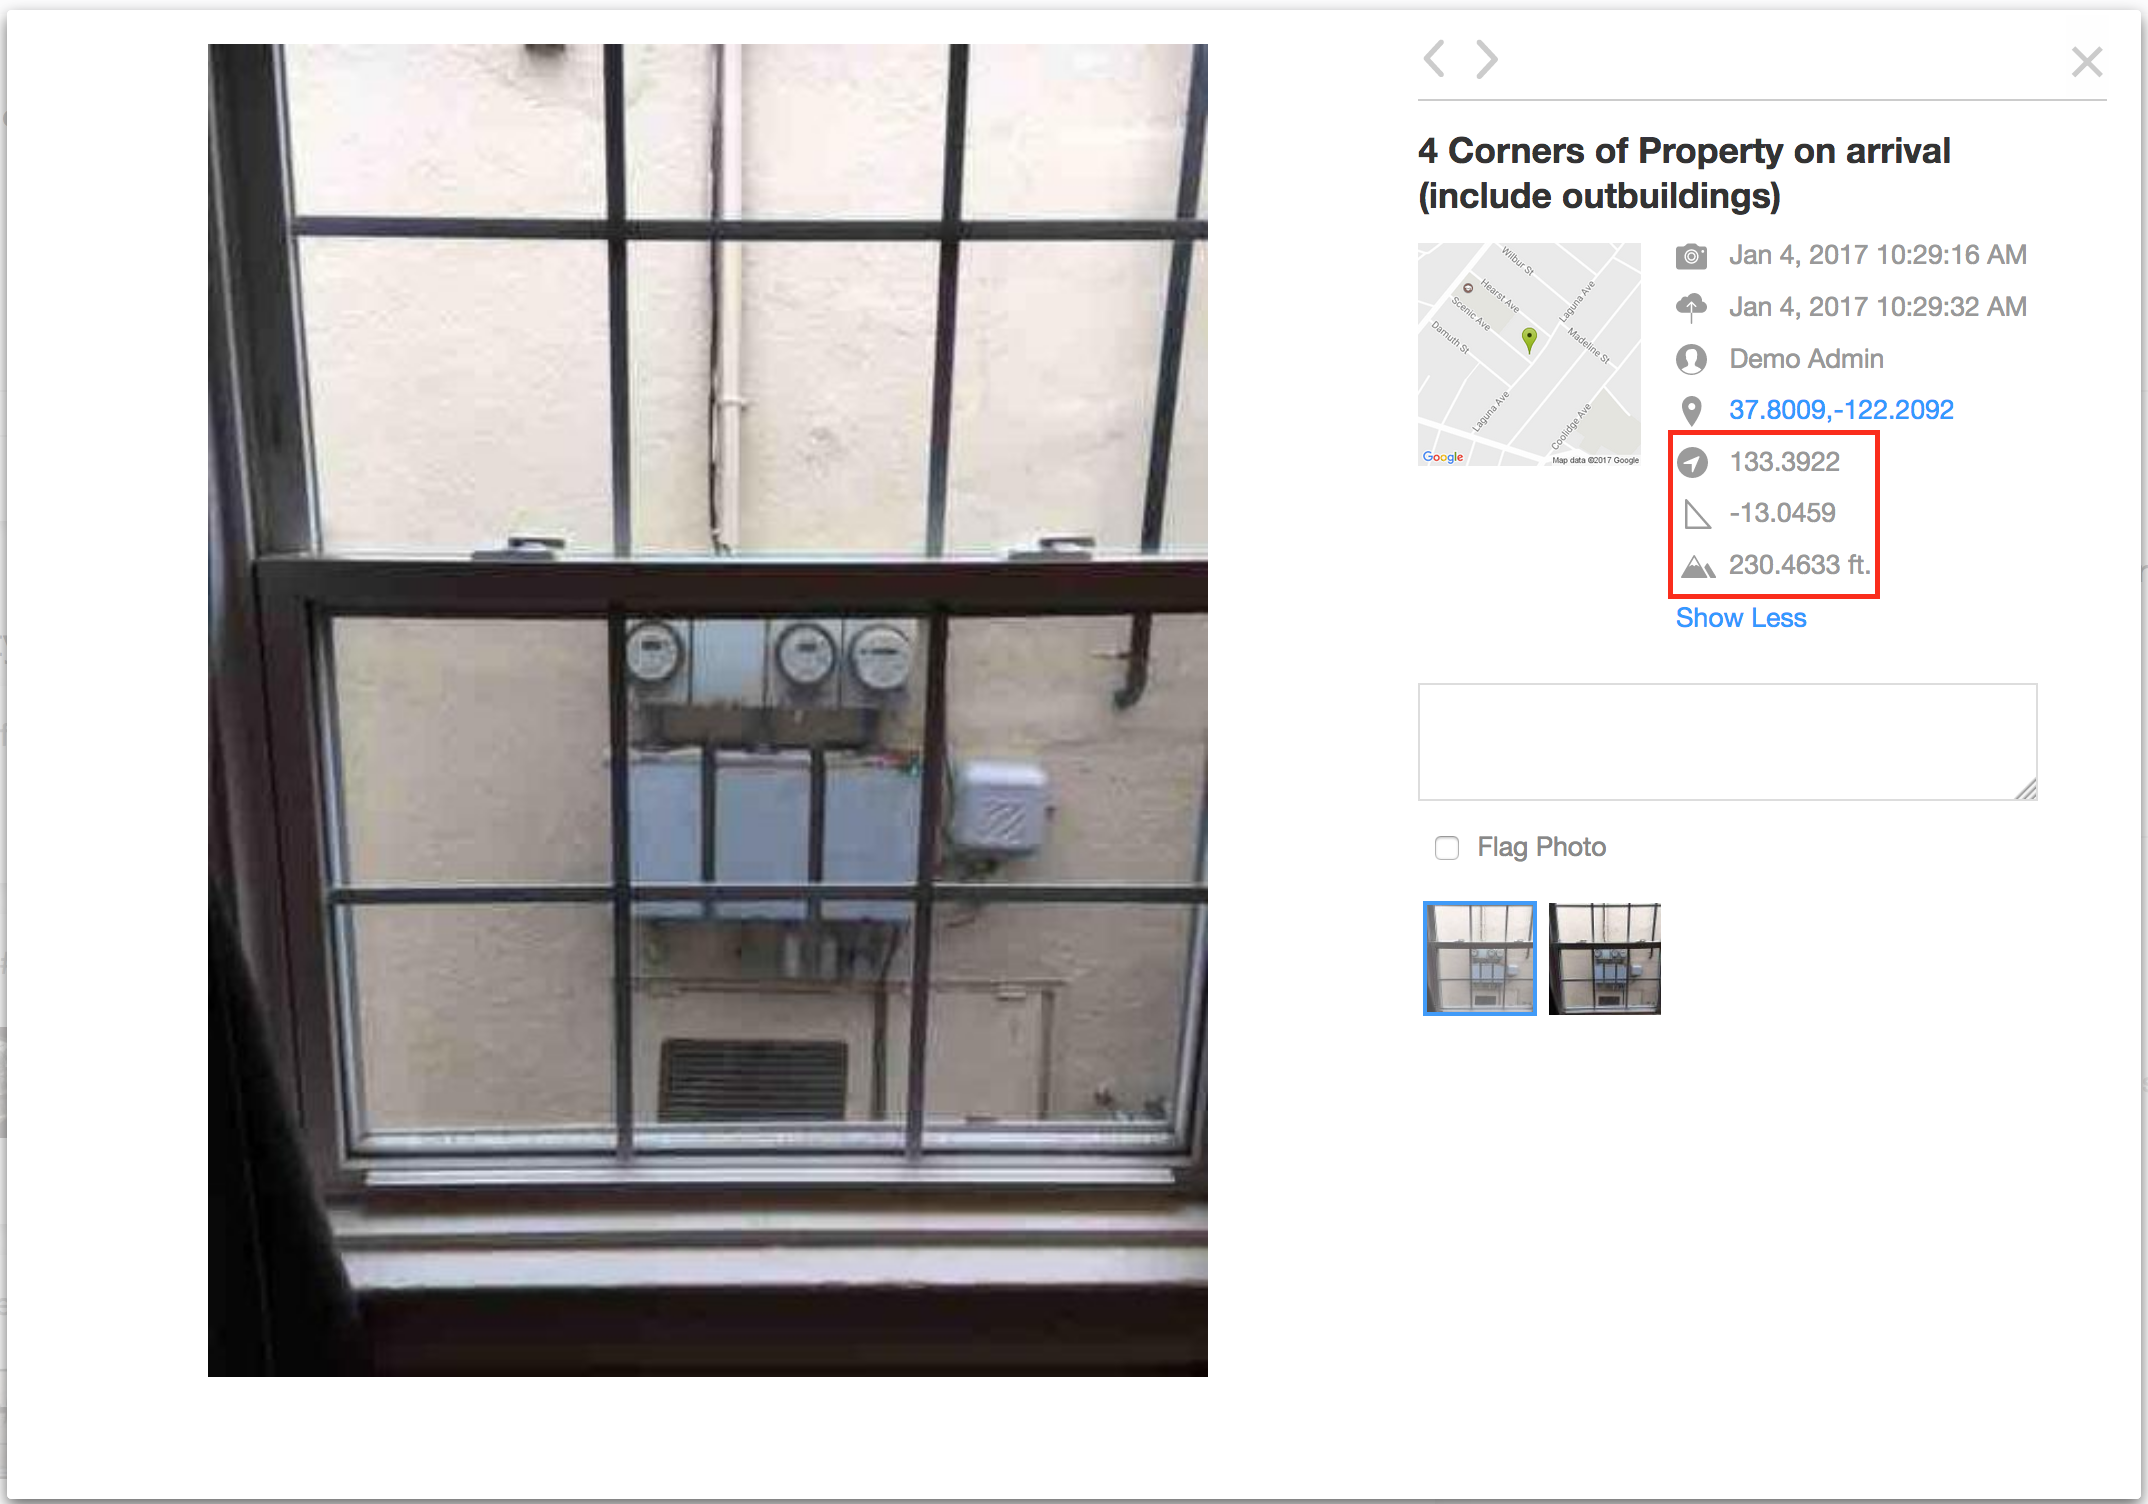
4. The azimuth, elevation, and elevation angle will be displayed. Click on "Show Less" if you wish to hide this information.
See: How to Sync & Sync Status for more information on making sure your photos have synced.
Delete Photos
1. Option 1: Delete a photo in the project view
Navigate to the photo you'd like to delete. Press and hold on the photo until the trashcan icon appears. Tap the trashcan to permanently delete the photo.
2. Option 2: Delete from the photo view
Open the photo you want to delete, then click the trashcan icon in the bottom-right corner. A confirmation pop-up will appear with options to Delete or Cancel.
Note: Deleting a photo is permanent and will remove it from all devices. This action cannot be undone.
Comments